How to Start Your Own Blog
Last Updated on March 27, 2024
How to start your own blog (successful one of course) From scratch, in 27 minutes, step-by-step guide to become a self made Website/Blog Boss!
Back in the old days of 2000, if you wanted to start your own blog you had to know html or other code language, you had to pay high fees to hosting companies, and monetization options were very limited. Today you can practically set up a professional blog and start making your first $ in a matter of minutes.
Free CMS platforms like WordPress, Joomla, Wix and others made it super easy to set up your own web properties with all the functionalities needed to turn it into a real business or an additional income source.
This guide is designed to give you clear and easy steps to follow to set up your first blog/website at the minimum cost and avoid all the expensive mistakes most people (including yours truly) had to make in order to learn how to do it right.
In a nutshell these are the steps to get your own wordpress blog:
1. Decide your blog topic.
2. Choose your blogging platform.
3. Choose a domain name.
4. Choose a hosting provider.
5. Get Your Blog Live!
6. Customize your blog.
7. Write posts and add pages
8. Get people to read your blog and make it successful!
(Don’t worry, I’ll walk you through each one below in-depth)
While you can get your website up and running in 30 minutes if you follow this guide, I would recommend to break down the process and not try to do it as fast as possible. So you can do step 1 and 2 today and step 3-4 tomorrow and so on. Just a friendly advice, of course you can go as fast as you like. If you get stuck in the process you can always send me an email to contact at selfmade.today and I will help you out.
Attention Please!
I ask you that before you start taking action please turn off any distractions such as T.V, social media, cell phone or anything that will take your focus away. If you have children running around I suggest going out to a coffee shop get a nice warm drink and set up your new blog!
Ready to create your blog today? Let’s get started…
Step 1: What should you blog about?
Most people looking to start their own blog are looking to earn some extra money out of it or even quit their day job and start an online empire. Both is more than possible believe me. That being said, it is been shown in many studies that money isn’t the best motivator, or it can’t be your only reason why you want to do something. That’s why when you’re brainstorming what niche/topic your blog should be about think about these 2 factors first:
Do you enjoy writing about the topic?
If you don’t you will have a hard time generating content consistently and it will show in your writing. If you’re not sure what to write about do a google search about “popular blogs” or “what should my blog be about” to get some ideas. You can write about diet, health, fishing, programming etc. but remember you have be passionate about your blog topic.
Do other people interested in the topic you write about?
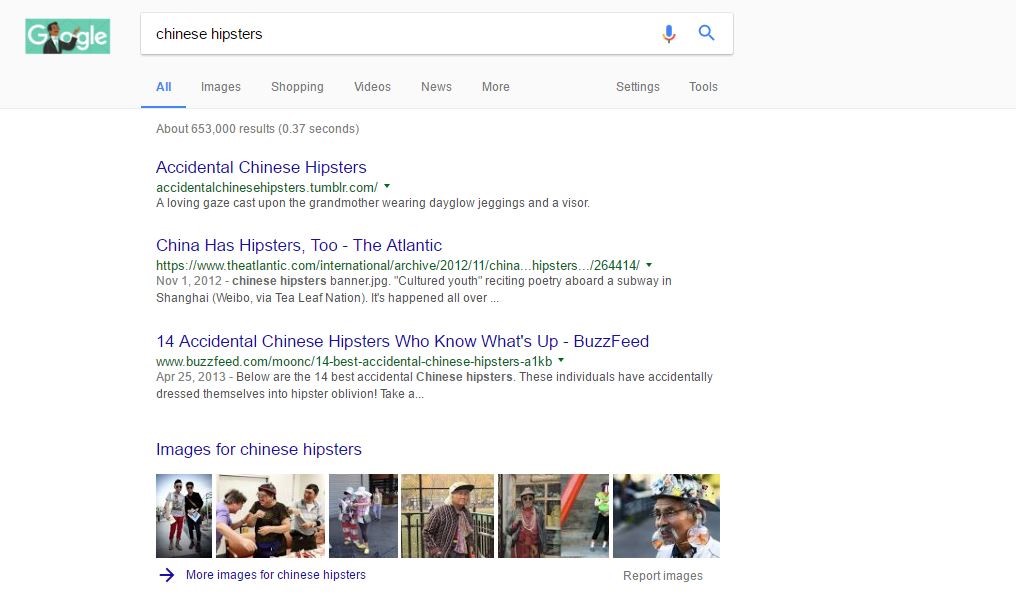
You might be passionate about writing on Chinese Hipsters, but the question is, do other people want to read about it? Do a quick Google search and you’ll find 653,000 results aimed at people just like you so maybe it is a blog topic you can find some followers for.
When you choose your blog topic try to be as specific as you can. You can use Google Free Keyword tool to generate ideas and get an estimated search volume. Try not to go to broad but not too specific to the point where there aren’t enough people searching for what you are writing about. If you want to start a blog about babies clothing it might be too broad of a topic, so you might want to try baby clothing for twins for example. If you start typing a broad term in google search box you will get suggestions and ideas to narrow down your topic
Step 2: Choose your Blogging Platform (WordPress)
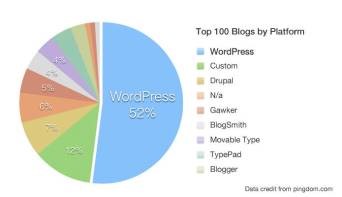
A blogging platform is the platform from which you manage your blog, i.e upload posts, images, videos, approve comments, insert advertisements and so on. There are plenty of blogging platforms out there but the most popular one as you can see is WordPress.
There are a few reasons for that:
- It’s FREE for everyone to use (including themes, plugins and add-ons that many other blogging platforms don’t provide).
- Super Easy to set up.
- It’s always updating with new features keeping it secure and relevant for the marketplace.
- Since it’s the most popular you can get all your questions answers on a simple google search by bloggers, the WordPress community and support forums.
- It’s HIGHLY customizable in terms of design and the blog functionality. There are tens of thousands of free themes and plugins that can help you achieve pretty much any look or functionality you need (For example a plugin that adds a subscription box, or add a contact us form).
Step 3: Choose Your Blog’s Name
Now let’s find a domain name for your blog. The address people will type in their browser and share with their friends to get to your blog. For example Google’s Domain is www.Google.com. Your new blog domain name will be classiccars.com or .net .biz .today (you can choose different suffixes) I recommend going with a .com or .net domain but even if you go with something else that’s ok. Here you have 2 options:
- You can head over to one of the domain register services like NameCheap and pick your domain- your desired domain might not be available but Namecheap will give you close suggestions till you find what you like and the best part most of NameCheap domains only cost you Only $0.99!
- When you sign up to BlueHost on the next step as your webhost you will get 1 free domain, so you don’t need to buy one from Namecheap.
When naming your blog, consider these:
- Aim for 2-3 words domain not more. Unfortunately, most, if not all single word domains are taken so try to use a keyword that represents what your blog is about. This helps people quickly identify your blog’s niche and helps search engines distinguish what your blog is about.
- Avoid using numbers and hyphens. They are difficult to remember.
- Go for something memorable or catchy.
- For personal brands, use your name or a variation of it.
Step 4: Choose a Home For Your Blog:
Web hosting – This will be the home of your blog address and content that’s on the blog. Without web hosting, you’ll be unable to use your domain. Think of it as a computer hard drive that stores all your content on your blog (images, blog posts and so on). The cost of web hosting is usually somewhere between $3-5 per month if you’re just starting out.
HOLD UP! At this point, you don’t need to install nor download anything – I’ll show you what to do in a minute, but first let me explain to you why you shouldn’t create a blog on a free hosting platform?
A free hosting platform like WIX or Weebly will let you host your blog content (posts, images, videos) for free.
But think about it for a second, why would a blogging platform will give you free hosting service? I mean it costs them money , so what’s in it for them? They are not doing it for good Karma I can tell you that. They make money of your hard work in other ways, like implementing their own ads and affiliate links on your site.
It’s not just that – you will have other problems like:
- You don’t control your content – the blogging platform does. They could shut you down any time, and for any reason. Don’t believe me? Read this.
- The web address of your blog will be long and hard to remember (like myawesomeblog.blogspot.com) instead of a catchy, branded address you choose.
- You’re not allowed to advertise on most free blogging platforms, making it much harder to ever make money from blogging.
Think about it – what famous, successful blogger you know is using a free blogging website like “startbloggingonline.freeblogs.com” instead of their own domain name like “StartBloggingOnline.com”, for example?
So while you will be using wordpress to manage your site for free you will need to choose a host for your site, which is basically where your content will be stored and distributed from.
If you ever want to build an audience and make money blogging, then you need your own blog, on your own domain name, with your own hosting.
And again as I mentioned earlier, these days, it’s so easy to do and it will cost you like a cup of coffee.
Small investment but an important one in order to succeed.
When it comes to hosting, there are only two things that matter.
- Page load speed – The average amount of time (in seconds) it takes your blog to load.
- Uptime – 99.9% isn’t enough (it’s 42 minutes of downtime per month). You should be aiming for 100%.
There are hundreds of different web hosting providers. They all offer you a similar service (domain + hosting) with a similar price, but after I’ve dealt with and monitored many famous and recommended web hosting companies I now only recommend BlueHost.
| BlueHost | |
| Key Features |
|
They have great customer service at a very low price and they can your blog up and running in minutes, on top of that they will also give you (1) new domain for free to start with. If you got your domain at namecheap in the previous step they will help you point it to your new BlueHost Server. And if you decide you don’t wish to pursue your blogging dream, you have 30 day money back guarantee so it’s really a no brainer! so go ahead and take 3 minutes to sign up with BlueHost and come back to the next step. We’re waiting for you!
Sign up with BlueHost (50% off Discount)
Step 5: Get Your Blog Live!
At the end of this step you will have a fully working, self-hosted WordPress blog on your own domain name! Sounds promising, huh? If at any step you get stuck, you can actually ask Bluehost support to install wordpress on your blog for you. But you can also do it yourself it’s really easy:
- Log in to your Bluehost cPanel account.
- Find the Website section and select Install WordPress.
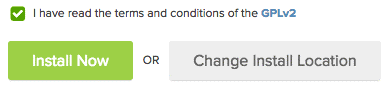
- Click the Install button.

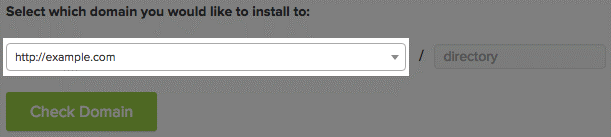
- Choose your domain name to install it to.

5.In the field next to the domain, you can enter a subfolder such as ‘blog’ or leave it blank if you want the site’s main page to be the blog.
6.If necessary, you can edit the email address, username and password for the new WordPress installation. Click “advanced options” and you can change those settings.
7.Select the Install Now button.
That’s it your blog is ready to take over the world! Go to your domain name on web browser and see it for yourself.
Good Job!
Step 6: Customize Your Blog
In this step we will choose the design and layout of your new blog.
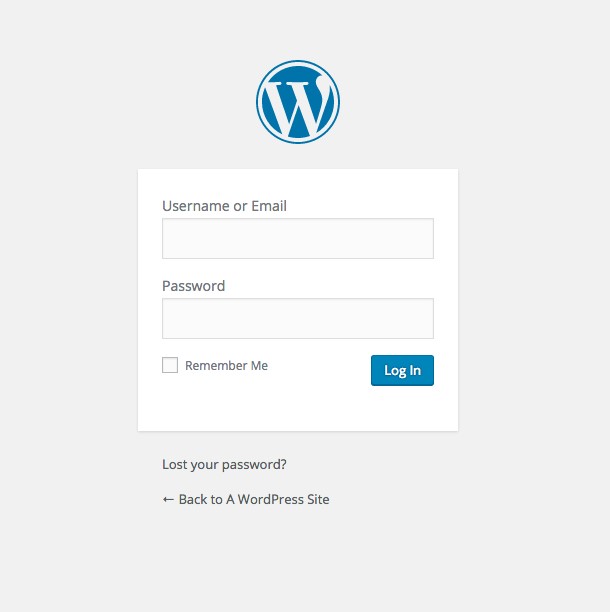
Let’s go to your new blog administration panel at yourdomain.com/wp-admin (this is your WordPress Admin URL where you will manage your blog from) and login with the user name and password you choose during the set up.
Let’s do a short acquaintance with the wordpress admin dashboard:
- “Dashboard” -This is where you see your recent activity, including how many posts, comments and pages you have.
- “Posts” -This is where you click if you want to add a new blog post or edit an existing one.
- “Media”– The library of all the pictures, videos, and audio files you’ve uploaded to the site. You can manage all of those items there.
- “Pages” -This is where you can add a new pages – like a services or contact me page (not a blog post!) and manage the pages.
- “Comments” –You can see here which comments are waiting for your approval, review comments you’ve approved, see which comments WordPress has labelled as spam and delete comments you don’t want.
- “Appearance” – This is where you can edit your blog’s design and install new themes and layouts..
- “Plugins” is where you’d click if you wanted to install a new plugin, like a contact form or SEO tool. I’ll show you how to do this in a moment.
- “Settings” -Here, you can change your site’s title and tagline, edit your email address and manage all of your site’s important settings.
Ok now let’s choose your blog’s design.
You will see the WordPress dashboard you will be managing your blog from. Head over to Appearance=>Themes=Add New
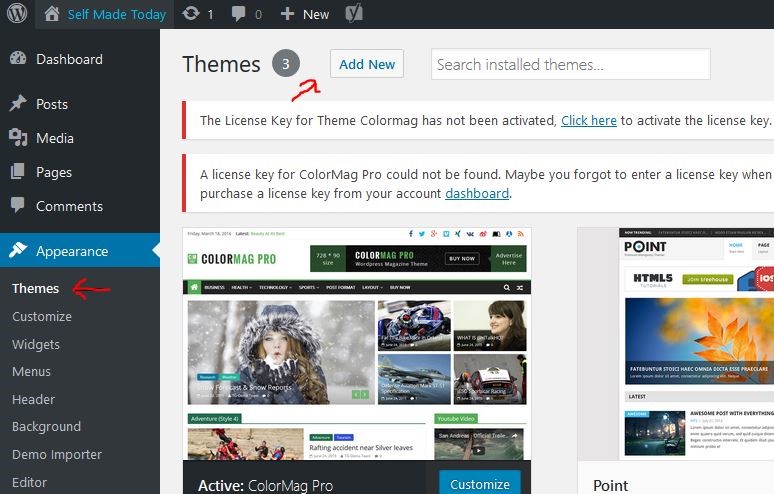
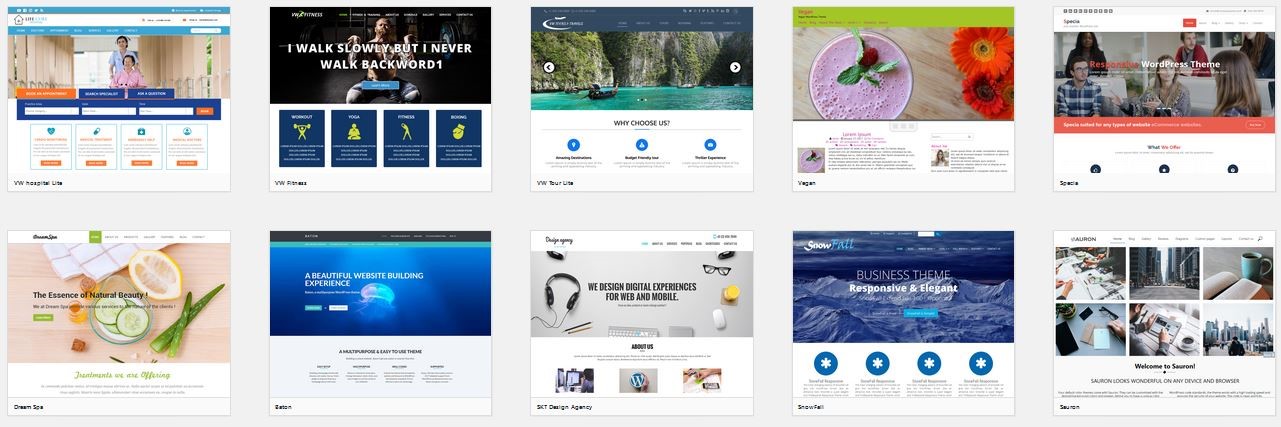
There thousands of themes and designs you can choose from for free. To help you get started with something good and free use the feature filter:

Apply the filters according to your liking and needs and choose a theme for your new blog. After you click install and then activate. Head over to your domain and see what the blog looks like. You can always change the design if you don’t like it.
*Important-Whichever theme you choose, look in the theme features that it is responsive-what it means is that the design and layout will change and adjust according to the device screen size (Desktop, mobile, tablet), this is super important as a lot of people will come to your site from mobile phones and tablets and you need to make sure they can view and read your blog easily.
If you can’t find a theme that you like, there are premium themes that you can purchase from sites like Themeforset but that’s up to you. I personally like Point Theme and ColorMag which are good for Magazine style blogs.
Installing a New Plugin (add some cool features to your blog)
“Plugins” are little software modules that you can install to add features and tools to your blog. They can do all sorts of things, like:
- Adding contact forms
- Reducing comment spam
- Making your blog SEO-friendly
- Creating newsletter sign-up forms
- Adding photo galleries
And lots, LOTS more.
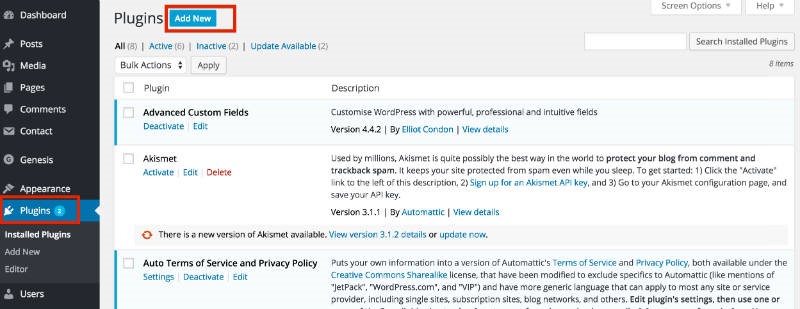
Installing them is really easy. First, Mouse-over “Plugins” in the sidebar, then click “Add New”.
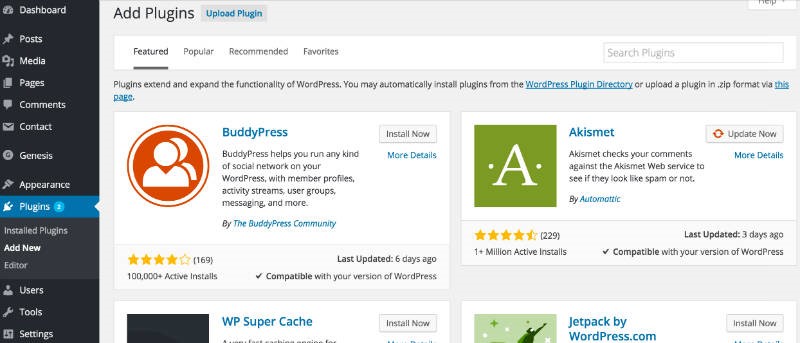
Now, you can search by keyword to find plugins for almost anything!
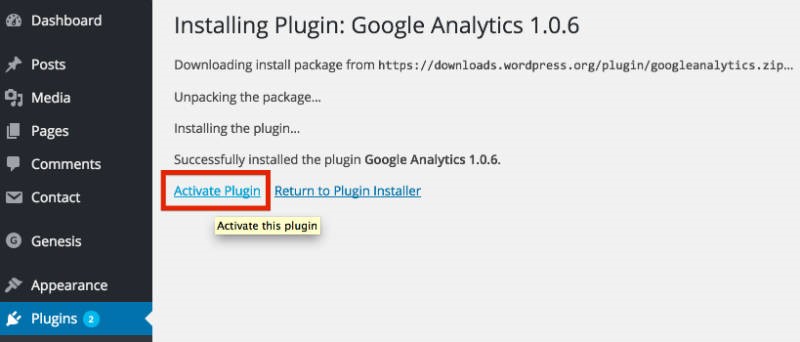
When you find a plugin you like, just click “Install Now” and then “Activate Plugin” on the page that follows.
Here are some of the top plugins you should have on your blog:
- Wordfence security-Best security plugin for wordpress, keeps your site safe and secure from hackers and malicious scripts.
- Contact Form 7-Create simple contact forms on your blog posts and pages.
- Yoast SEO– SEO is important, this plugin will basically help you optimize your blog settings and blog posts so that people can find them
- Simple Social Share-Adds social share buttons to your blog pages and posts so people can like and share your blog which eventually will get you more traffic.
- Google Analytics – Tracking how and when users visit your site is important. You can view statistics like which countries your visitors are coming from how long they stay on site, which content they read and many other data points which will help you improve your site. Watch How to Install Google Analytics on WordPress
- TinyMCE Advanced-visual editor for WordPress which will help you edit posts and pages.
Make sure your plugins (and themes) are always up-to-date. WordPress will let you know when some of them are out of date. (Wordfence plugin will do that too)
Making your url’s Look Nice
To make your url’s search engine friendly we are going to set them up in a nice format.
By default your URL will look something like this
http://yourblog.com/2017/08/myblog/author-Karen/how-to-start-a-blog
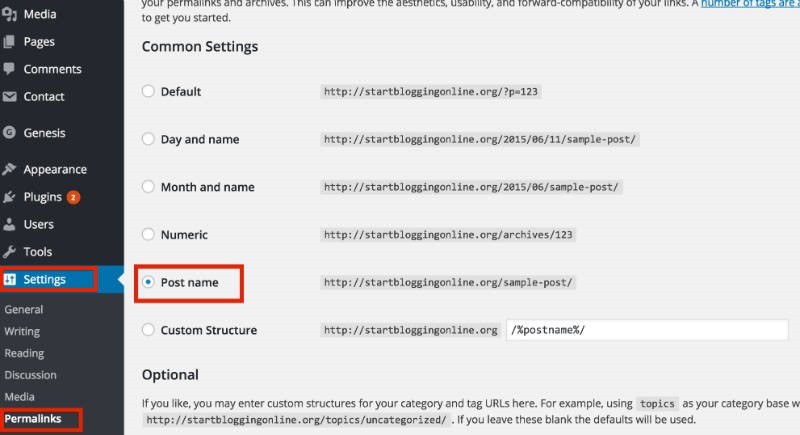
But it’s nicer and better for your SEO to have them look like this:
http://yourblog.com/start-a-blog
In order to change your links to a more cleaner, friendly form click on “Settings” -> “Permalinks” and use the following settings and click save, and your url’s are set!
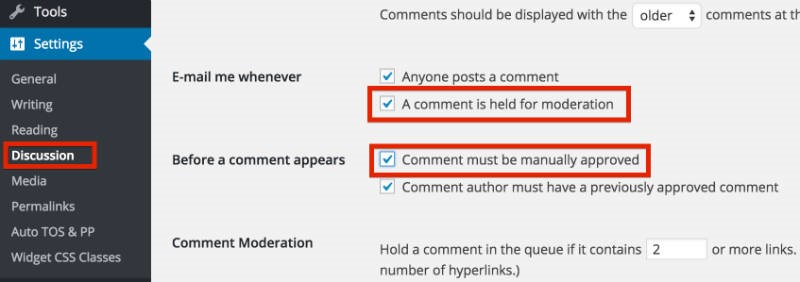
Moderating Spam comments
Unfortunately, lots of people will leave automate spam comments on your blog. They do that for couple of reasons – to get people from your blog to their blog and to advertise their services/products.
To avoid that, make sure you moderate your comments. Here’s how to do that: Go to “Settings” -> “Discussion” and tick those two options. Click save.
Step 7: Write Your First Blog Post
Congratulations – Not a lot of people made it to this step. Having your own functional blog on wordpress.
Now we need to start adding blog posts and pages to your blog and fill it with great content for your readers.
To add a new blog post, click the “Posts” section on the left hand side-menu, then click on “Add New”.
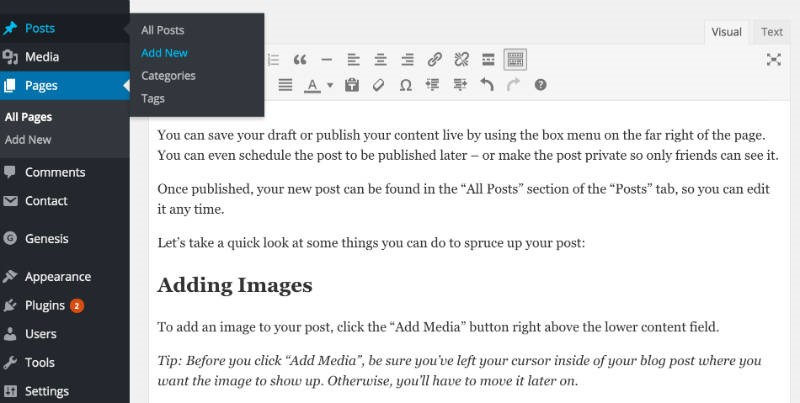
You can add the title to your blog post in the top field, and your content goes in the big text box below the title.
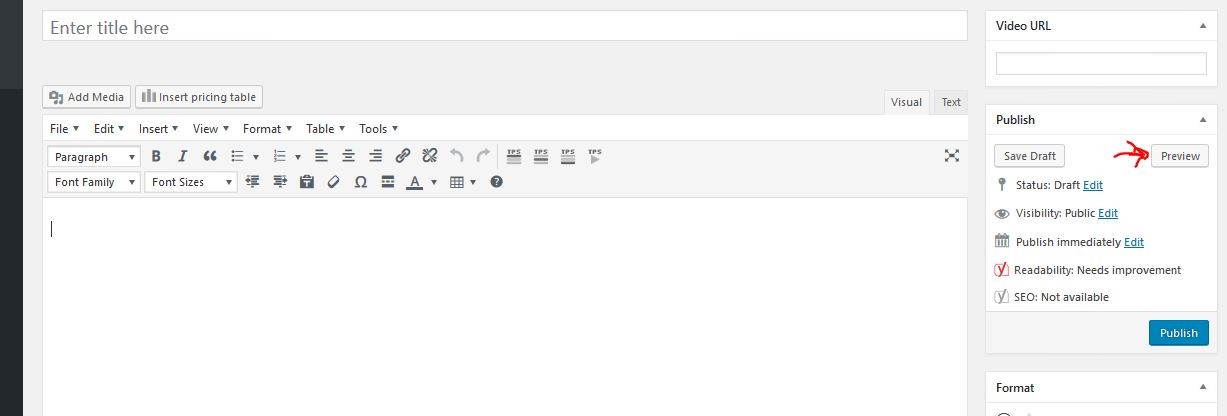
You can save your post as a draft if you are not ready to publish it yet. Or publish your content live by using the box menu on the far right of the page. You can also schedule the post to be published later. You can preview your post before publishing it by clicking preview on the right hand side.
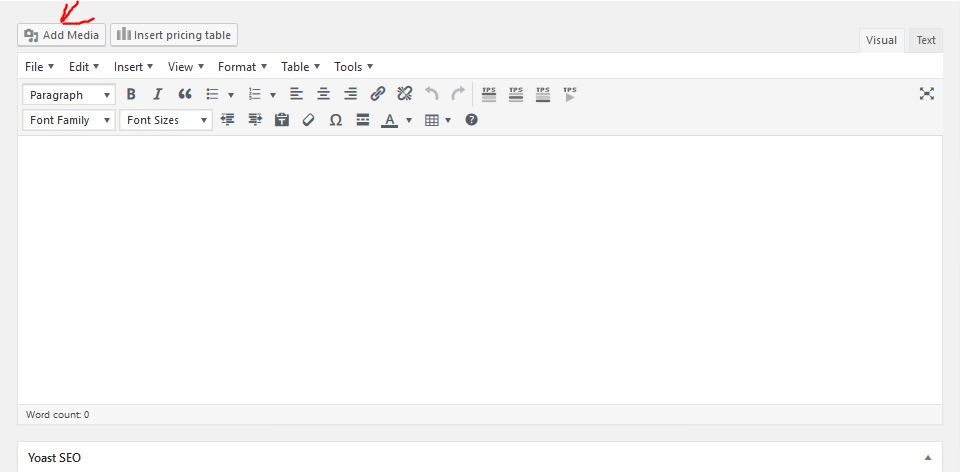
If you want to add pictures to your post simply go to add media and upload your image to your wordpress media library and click insert into post.
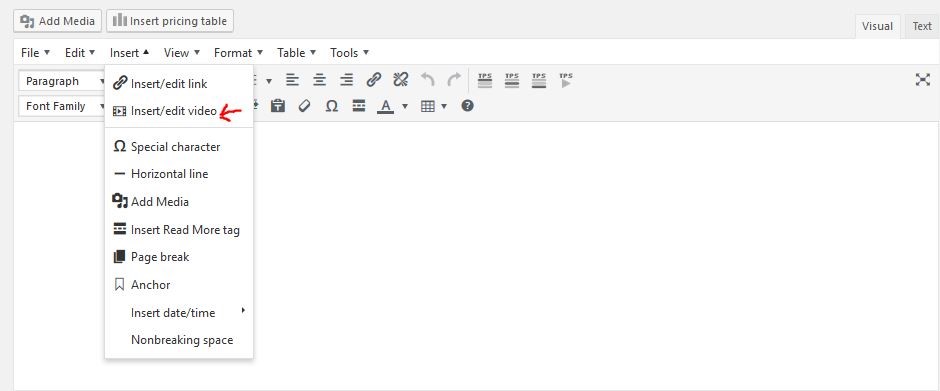
If you want to add videos you can go to Insert-insert/edit video and insert either the video URL or embed code.
Step 8: MAKE YOUR BLOG SUCCESSFUL
In order to make your blog successful in terms of income at least you need to follow a simple formula:
Great content+Traffic+Monitezation=$
So the first part you will need to fill your blog with great posts about the topic of your blog. So if your blog is about horse riding you can start by searching for blogs about horse riding and write down ideas for posts for your blog.
Don’t copy posts from other blogs, gather information about the topic and write useful content for your readers. I suggest adding about 10 posts at first and than run a post schedule where you will add 1 post a week or a month it’s up to you.
You will also create pages for your blog, these 2 pages you will see in almost every blog:
Contact us-add a contact form using the contact form plugin.
About me /us-Write down a bit about your blog and your mission. For example: Our football blog is here to bring you the latest and most interesting updates about the NFL.
*Pro Tip:If you need great Free Images for your site try these:
The next part of the equation is traffic. there are many ways to get traffic for your blog free and paid. Since you’re just starting out, we’ll stick to a few free methods.
- Open social media accounts for your blog and publish your content there: Facebook, Twitter, Instegram, Reddit, Pinterest, Google plus and others have ton of traffic, get your friends to like and share your content and start following people in your niche, and they will follow you back and you’ll start building an audience.
- Reach out to other bloggers in your niche and ask them to do a cross promotion: They will publish your content with credit and link back to your blog and you will do the same for them
- Submit Your Content to Blogging Communities: Check out this article about 5 blogging communities to submit your blog to.
There are hundreds of ways to drive traffic for your blog, and we’ll do a different post about it, but for now stick to those and learn more as you go.
The last part of the equation is monetization, there are many ways you can make money of your blog, here are a few popular ones. You can also read our post how to make money from your blog
- Display ads- Sign up to networks like Google Adsense, Revcontent, ezoic once they approve your blog you will get code to add to your site where you will earn money for people watching or clicking ads on your site.
- Sell Physical products-With affiliate program like Amazon or ebay you can display ads with their products and earn commission for every sale generated from your site.
- Sell digital products- You can sign up to clickbank and get access to thousands of digital products like how to win your ex back or how to make money online and earn sales commission. You can also try Udemy and promote online courses.
Again many other options here as well but outside the scope of this guide.
Conclusion
You got your own blog now, great job!
You still have a lot to learn but you have taken significant action and you’re on your way to success. Be consistent, post great content and keep learning. this is a big step, but it’s just the beginning. Please share your story in the comments and share this guide if you think your friends and families can benefit from it also.